

Natural Mortar: Build with Clay, Sand & Water (Guide)
You don’t need cement or fancy equipment to build a solid fire pit, smoker, or shed. Natural mortar—made from clay, sand, and water—has held structures together for thousands of years, and it’s surprisingly easy to make yourself.
This guide covers three dead-simple mortar recipes using materials you can find on your land. We’ll use a 5-gallon bucket for measurements (no scales needed), and I’ll show you the easiest mixing methods—including just spreading a tarp and stomping it with your feet.
Whether you’re working with bricks, stones, or wood, these recipes work. Ready to learn an ancient skill that’s easier than you think?
Why Natural Mortar Works
Natural mortar is made from clay (stickiness), sand (strength), and sometimes straw (prevents cracking). People have used this recipe for centuries to build adobe homes, stone walls, and outdoor structures.
The best part? It’s forgiving. Too wet? Add sand. Too crumbly? Add clay. The materials are free, you work at your own pace, and it sets over several days—giving you time to adjust.
For off-grid projects like fire pits, smokers, or small sheds, natural mortar is more than adequate. It won’t match cement for heavy structural loads, but for most homestead projects, it does the job.
Step 1: Find Clay-Rich Soil
Clay is your key ingredient. You’re looking for soil that feels smooth and sticky when wet—not gritty like sand.
Where to Look:
- Low-lying areas where water collects (near creeks, ponds, drainage spots)
- Dig 1-2 feet down—clay is usually below topsoil
- In clay-heavy regions like the Canadian prairies, it’s almost everywhere
The Squeeze Test: Grab damp soil and squeeze it in your fist. If it holds shape like playdough and feels slick, that’s clay. If it crumbles or feels gritty, keep looking.
Optional Jar Test: Fill a jar halfway with soil, add water and a pinch of salt, shake well, let settle 24 hours. Clay settles as the top layer. If clay makes up about 1/4 of the soil, you’re good.
If you’re building foundations for water storage tanks, this same mortar works perfectly for stable stone or brick bases.
Step 2: Gather Your Materials
Everything you need is free and close by.
Clay
- Where: Low spots, creek banks
- How much: 1/4 of a 5-gallon bucket
- Prep: Pick out large rocks
Sand
- Where: Riverbeds, beaches, dry streambeds
- How much: 3/4 of a bucket
- What to look for: Gritty, coarse sand (avoid fine dust)
Straw or Grass Fibers (Optional)
- Where: Dried grass, aged manure
- How much: 1-2 large handfuls
- Prep: Chop into 1-2 inch pieces
Skip the straw for the simplest recipe—it’s helpful but not required.
Step 3: Mix Your Mortar (Three Proven Recipes)
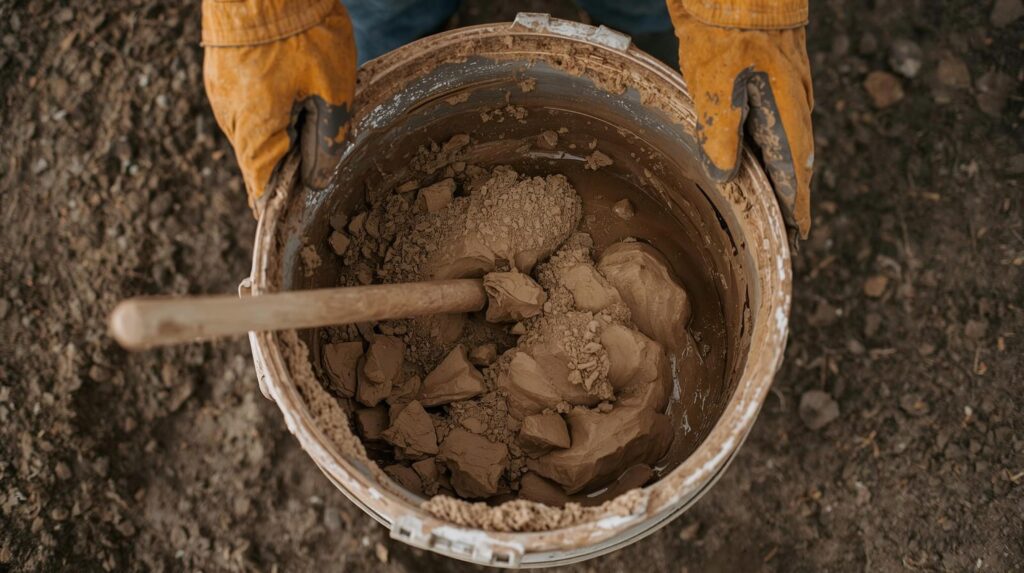
All measurements use a 5-gallon bucket. One bucket of finished mortar covers a small fire pit (20-30 bricks or stones). Mix until it’s the consistency of thick peanut butter.
Easiest Mixing Methods (Pick One)
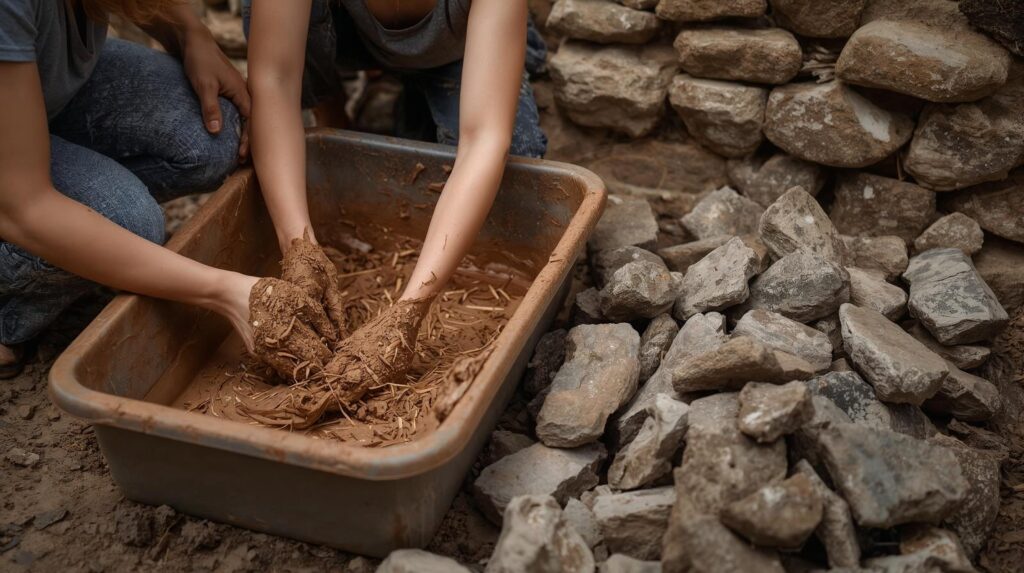
Tarp Method (My Favorite): Spread a tarp on the ground. Dump materials on it, then mix by pulling tarp edges to roll and fold. Add water slowly. The tarp contains mess and makes cleanup easy.
Bucket Method: Mix in your 5-gallon bucket using a stick or shovel. Stir like thick soup, adding water gradually.
Ground Pit Method: Dig a shallow pit (1 foot deep, 3 feet wide). Dump materials in and mix by stomping with clean feet.
Pro tip: Mix dry ingredients first, then add water gradually. Too wet? Add sand. Too dry? Add clay or water. Let mix sit 1-2 days for easier spreading (optional).
Recipe 1: Basic Clay-Sand Mortar (Simplest)
Best for: Dry climates, beginners, fire pits, stone walls
Ingredients:
- 1/4 bucket clay
- 3/4 bucket sand
- 1-2 gallons water (add slowly)
Method: Break up clay lumps (soak overnight if hard). Mix using tarp, bucket, or pit method. Add water gradually until thick and sticky—not runny. Use immediately or let rest a day.
Why it works: Ancient recipe. Just clay, sand, water. Dries strong for most projects.
Recipe 2: Clay-Sand-Straw Mortar (Most Popular)
Best for: Larger projects, humid climates, sheds, smokers
Ingredients:
- 1/4 bucket clay
- 3/4 bucket sand
- 1-2 handfuls chopped straw or grass (about 1/8 bucket)
- 1-2 gallons water
Method: Chop straw into small pieces. Mix dry ingredients, then add water gradually. Stomp or stir well. Let rest 1-2 days for best results.
Why it works: Straw acts like reinforcing bars, preventing cracks. Ideal for projects exposed to weather or temperature swings.
Recipe 3: Lime-Sand Mortar (Advanced)
Best for: Very wet climates, maximum water resistance
Ingredients:
- 1/4 bucket lime putty (from burning limestone/shells)
- 3/4 bucket sand
- Less than 1 gallon water (lime putty is already wet)
Method: Making lime involves burning shells/limestone 24-48 hours, cooling, then adding water to create putty (wear gloves—it’s caustic). Mix with sand. Let age a day before using.
Why it works: Sets harder and resists water better than clay-sand. More work, rarely necessary unless very rainy area.
Recommendation: Stick with Recipe 1 or 2 unless you have specific need for lime.
Using These Recipes for Bricks, Stones, or Wood
All three recipes work for bricks and stones as-is. For wood projects (shed posts, log frames), use Recipe 2 and make it thicker (less water, more like cookie dough). Straw helps mortar grip wood texture. Test a small section first.
Step 4: Basic Building Technique
Once your mortar is mixed, building is straightforward:
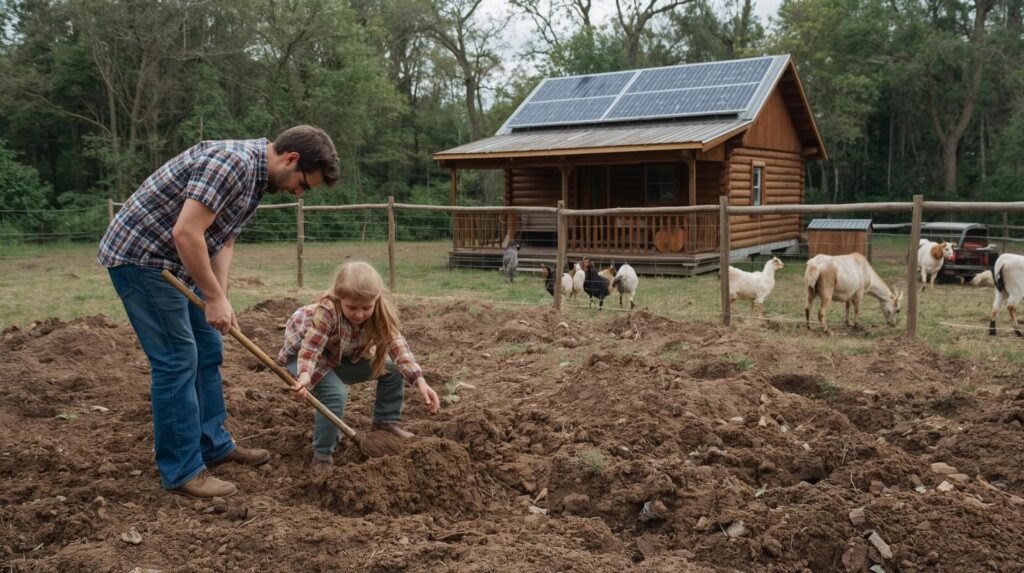
1. Prepare your site: Clear flat area. Dig shallow trench (6-12 inches deep) for foundation. Fill with gravel or compacted dirt for drainage.
2. Lay first course: Place first layer of stones, bricks, or wood posts. Set them dry or use small amount of mortar to stabilize.
3. Apply mortar: Spread 1/2 inch of mortar on top of each piece before adding next layer. Press down gently and tap with rock or stick to level.
4. Fill gaps: Use extra mortar to fill spaces between stones or bricks. Smooth with fingers or stick.
5. Cover while curing: Drape a canvas tarp over your work at end of each day. Keeps rain off and slows drying, preventing cracks.
Tools that help: A mason’s trowel makes spreading easier, but hands or flat stick work fine.
Step 5: What You Can Build
Once you’ve got mortar basics down, the possibilities open up:
Fire pits: Mortar stones in a circle for efficient, long-lasting campfires
Smokers or BBQ pits: Build stone box with grate for smoking meat
Tool sheds: Use mortar for stone/brick walls or anchor wood posts
Garden walls: Low borders for raised beds or terracing
Small ovens: Stone pizza ovens or baking chambers
Once you’ve built an outdoor smoker or BBQ pit, pair it with quality off-grid cooking equipment to complete your setup. For heating during cold weather builds, portable propane heaters keep your workspace comfortable.
I’ll cover specific build instructions for these projects in future articles. For now, get comfortable making and using mortar. Once you’ve done that, building is just stacking and patience.

Tips for Success
Safety: Wear gloves if working with lime. Build fire pits away from dry grass or structures.
Fixes:
- Cracks forming? Add more straw next batch
- Too dry and crumbly? More clay
- Too wet? More sand
- Not sticking to wood? Thicken it and rough up wood surface first
Maintenance: Check projects each year and patch cracks with fresh mortar. For extra weather protection, brush on thin layer of watery clay as seal.
Helpful tools: Tarp for mixing, shovel, trowel speed things up—but not required. You can do this entire process with hands and basic items you already own.
Frequently Asked Questions
Q: How long does natural mortar take to cure?
Natural mortar reaches workable strength in 3-7 days but continues hardening for weeks. Cover with tarp while curing to prevent rain damage and cracking. Full strength develops after 2-3 weeks.
Q: Will natural mortar survive winter freeze-thaw cycles?
Clay-sand-straw mortar (Recipe 2) handles freeze-thaw better than basic clay-sand due to fiber reinforcement. Lime mortar (Recipe 3) offers best freeze resistance. Avoid Recipe 1 in areas with harsh winters unless structure is covered.
Q: Can I add cement to natural mortar for extra strength?
Yes, but it changes the character. Adding 10-20% cement (Portland cement) to Recipe 2 increases strength and water resistance while keeping natural appearance. This hybrid approach works well for exposed foundations or high-traffic areas.
You’re Ready to Start
Natural mortar isn’t complicated—it’s clay, sand, and water mixed to the right consistency. You dig a little, mix on a tarp, and build.
Start small with Recipe 1. Make a batch, test it by stacking a few stones, and see how it dries over a week. Once you’re comfortable, scale up to whatever project calls to you.
The hardest part is just starting—after that, you’ll wonder why more people don’t do this.
Affiliate Disclosure: We earn commissions when you purchase through our links (Amazon Associates, AWIN, CJ Affiliate) at no extra cost to you. Our recommendations are based on research, not commission rates.
*Prices current as of publish date and subject to change.